
Hello everyone, welcome back! More huge progress this fortnight – really working at a cracking pace at the moment. I’ve been doing so much refining and polishing the tutorial quest and integrating the tutorial quest within the game’s formal tutorial prompts, and with all of this done, I genuinely think this introductory section is as complete as I can possibly get it now for 0.11, and as good as I can get it without some solid playtesting that will tell me whether or not there’s still some glaring issue here that I’m just not seeing. While I made huge progress on this last time, there turned out both to be quite a bit left to do to make it all as streamlined and clear for the new player as possible, and there were quite a few small additions I wanted to throw in as well. Some of the generators also weren’t completely finished, so I returned to them to give them the extra attention they deserve, and as I say, I enabled all tutorial prompts and tried playing through every possible scenario I could think of that a new player might do, and ensuring that both the in-game (from the curator and the clues) and the out-of-game (from the tutorial pop-ups) information was sensible and logical for every possible set of actions a new player might do, giving both the freedom for the new player to make their own way and ignore the tutorial, but also to be very clear that it is a recommended quest for the new player. I’m really pleased with all this advancement, and there’s even an exciting secret extra bit of progress at the bottom of this entry, beyond all this work finishing off every inch of the tutorial quest (but don’t spoil yourself by scrolling down!).
So, let’s get into it:
Tutorial quest and tutorial prompts
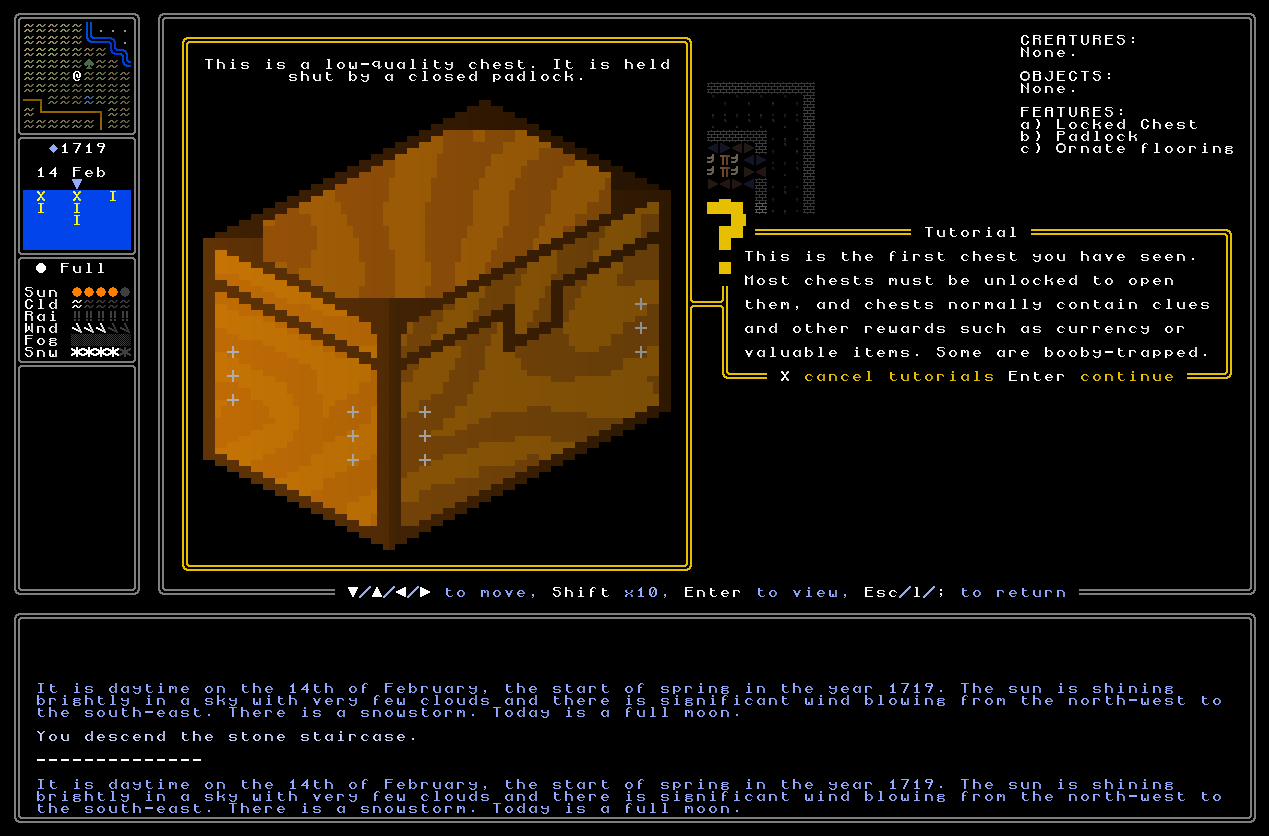
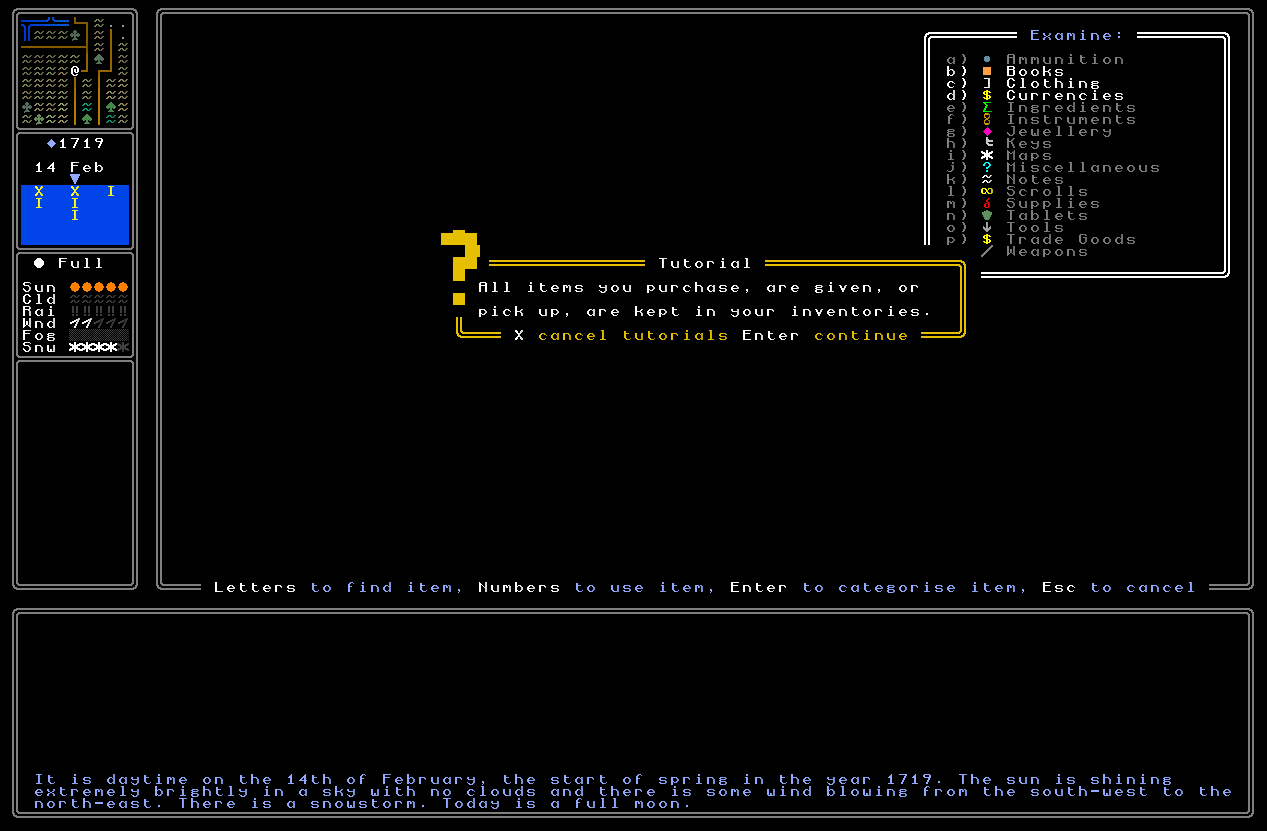
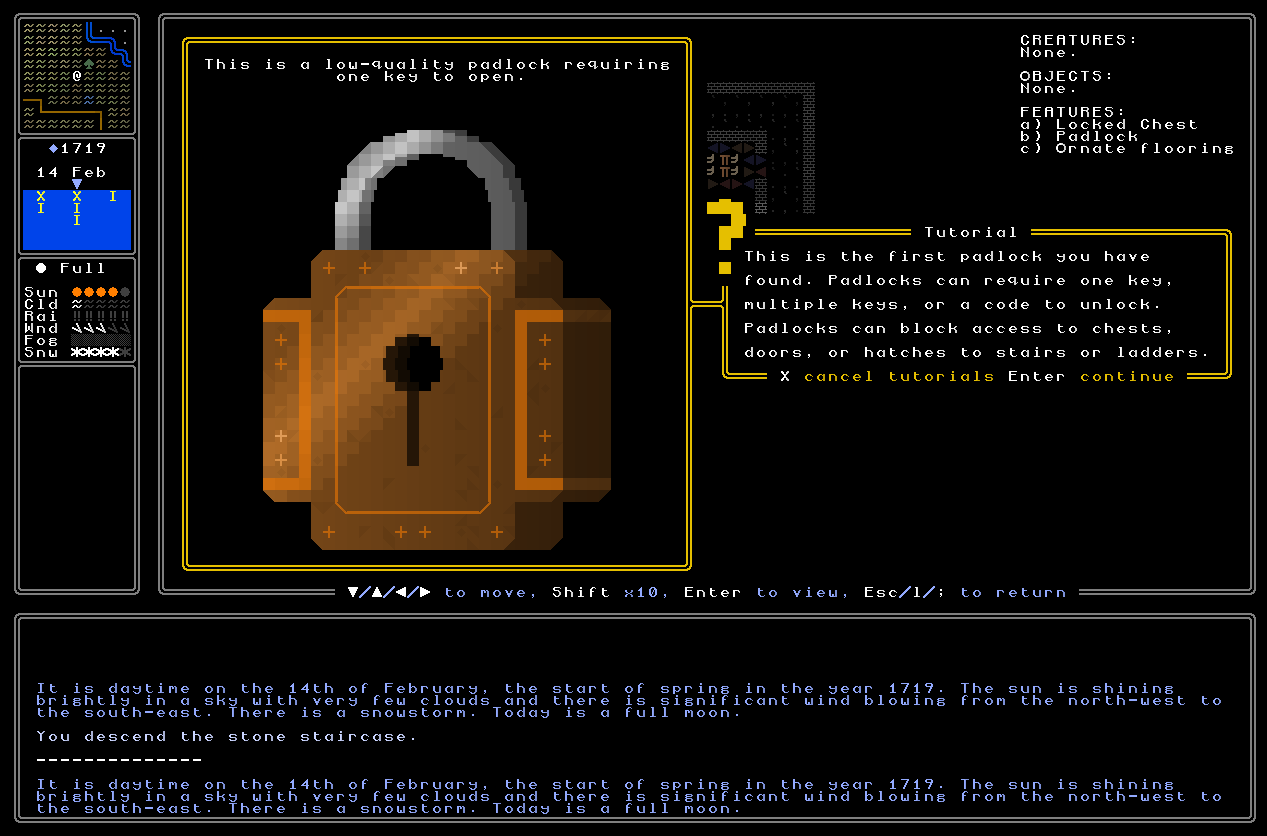
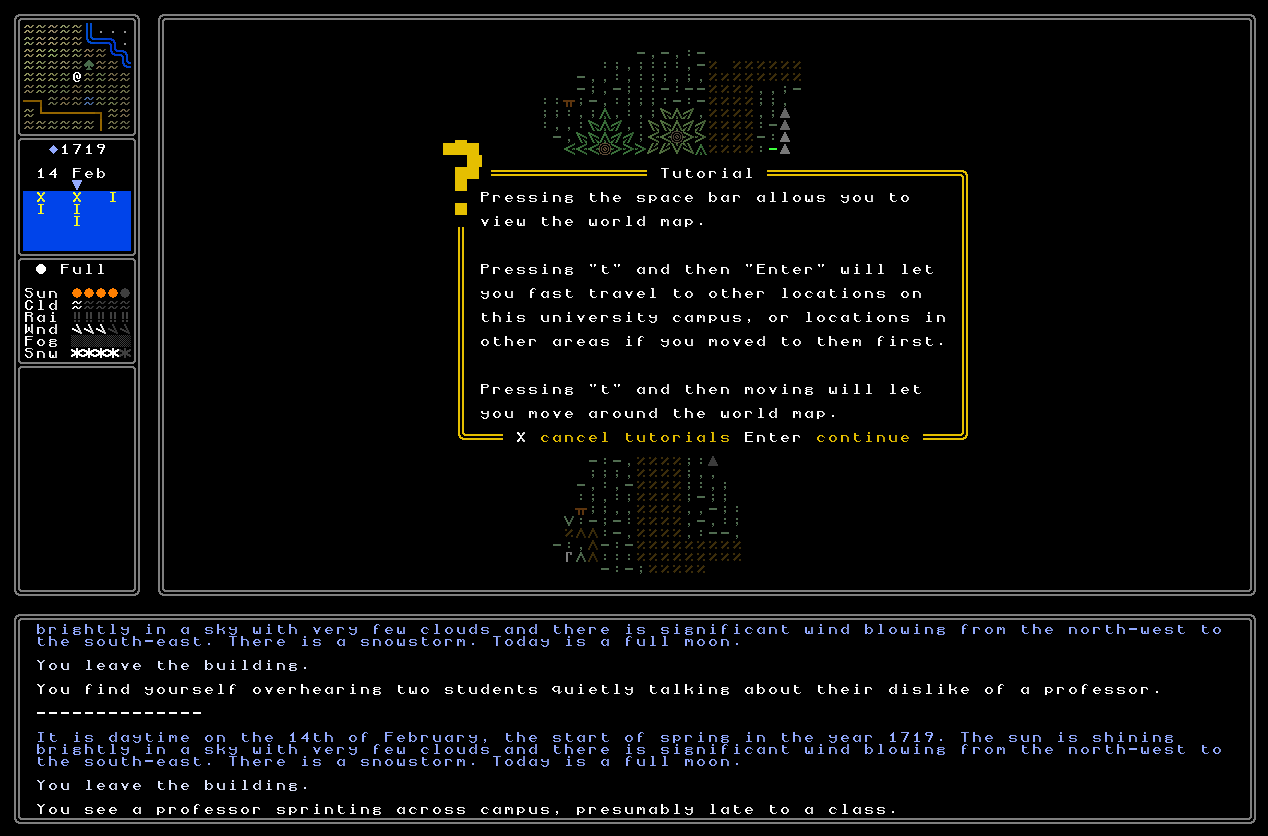
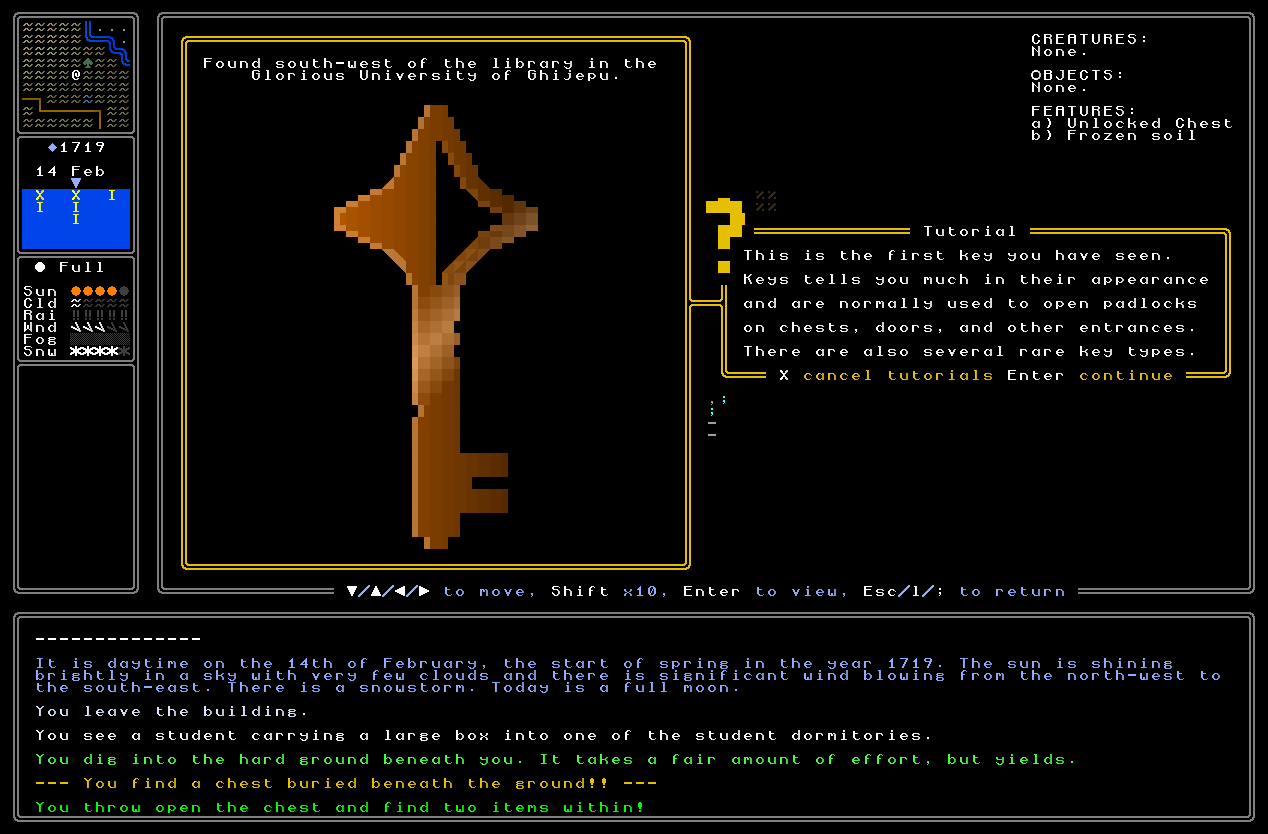
One really important thing I set about doing this week is making sure all the tutorial prompts – i.e. the gold pop-ups that give you non-diegetic information about the game – match and sychronise really well with the tutorial quest, but also of course give you plenty of “outs” if you want to skip the tutorial quest as an experienced player, or just want to skip the tutorial quest per se. There are quite a few tutorial prompts in the game already from when I developed the tutorial system, but those were all implemented before I actually knew precisely how the tutorial / introductory quest on the university campus was going to play out, so I realised I needed to really go back here and spend some time with these to ensure they all made sense, to ensure the logic of what tutorials appear when and why all still made sense, and to add any missing ones that I didn’t realise would be required then, but are definitely required now. Happily the great majority still made sense once you’ve been given both the tutorial clues and the initial clues for the main quest (which again hasn’t happened yet, but will in the next month or so), but I did feel a couple of extra ones probably ought to be added. These new ones are for keys, padlocks, and chests. Although the curator says something to you about these during their dialogues, and the descriptions of the items are pretty damned clear, I’m still confident it’s important to really highlight how these work – and it’s a good way to give you some information about them, too, that might not be presented diegetically, or just offers us another way to hammer home the same points again. I had a moment of worry there might be too many tutorial prompts now, as I was playing through it, but then I had to keep in mind that I’m moving through this testing at extremely high speed – having absolute familiarity with controls and game objectives – and the new player isn’t going to be doing that, so it should be fine. And, besides, they can cancel tutorial prompts if they want to. I enjoyed writing the new prompts too, although particularly tricky, actually, were the descriptions of how “t” to travel works, because in that prompt I needed to do two things. For the totally new player trying to work out what the hell to do, I needed to make clear that “t” then “Enter” would let them fast travel around the university campus, but that also had to be situated within the wider context of what the travel function enables, i.e. moving around the world map. This might sound simple but I took quite a while to find the exact wording here that prioritised the tutorial, but also framed it more broadly, and did so in a way that was as short on words as possible (as I don’t want tutorials to be too wordy). I finally – see the fourth screenshot below – found a phrasing that I was actually happy with here, and made the appropriate adjustments.
Rhyme refinement
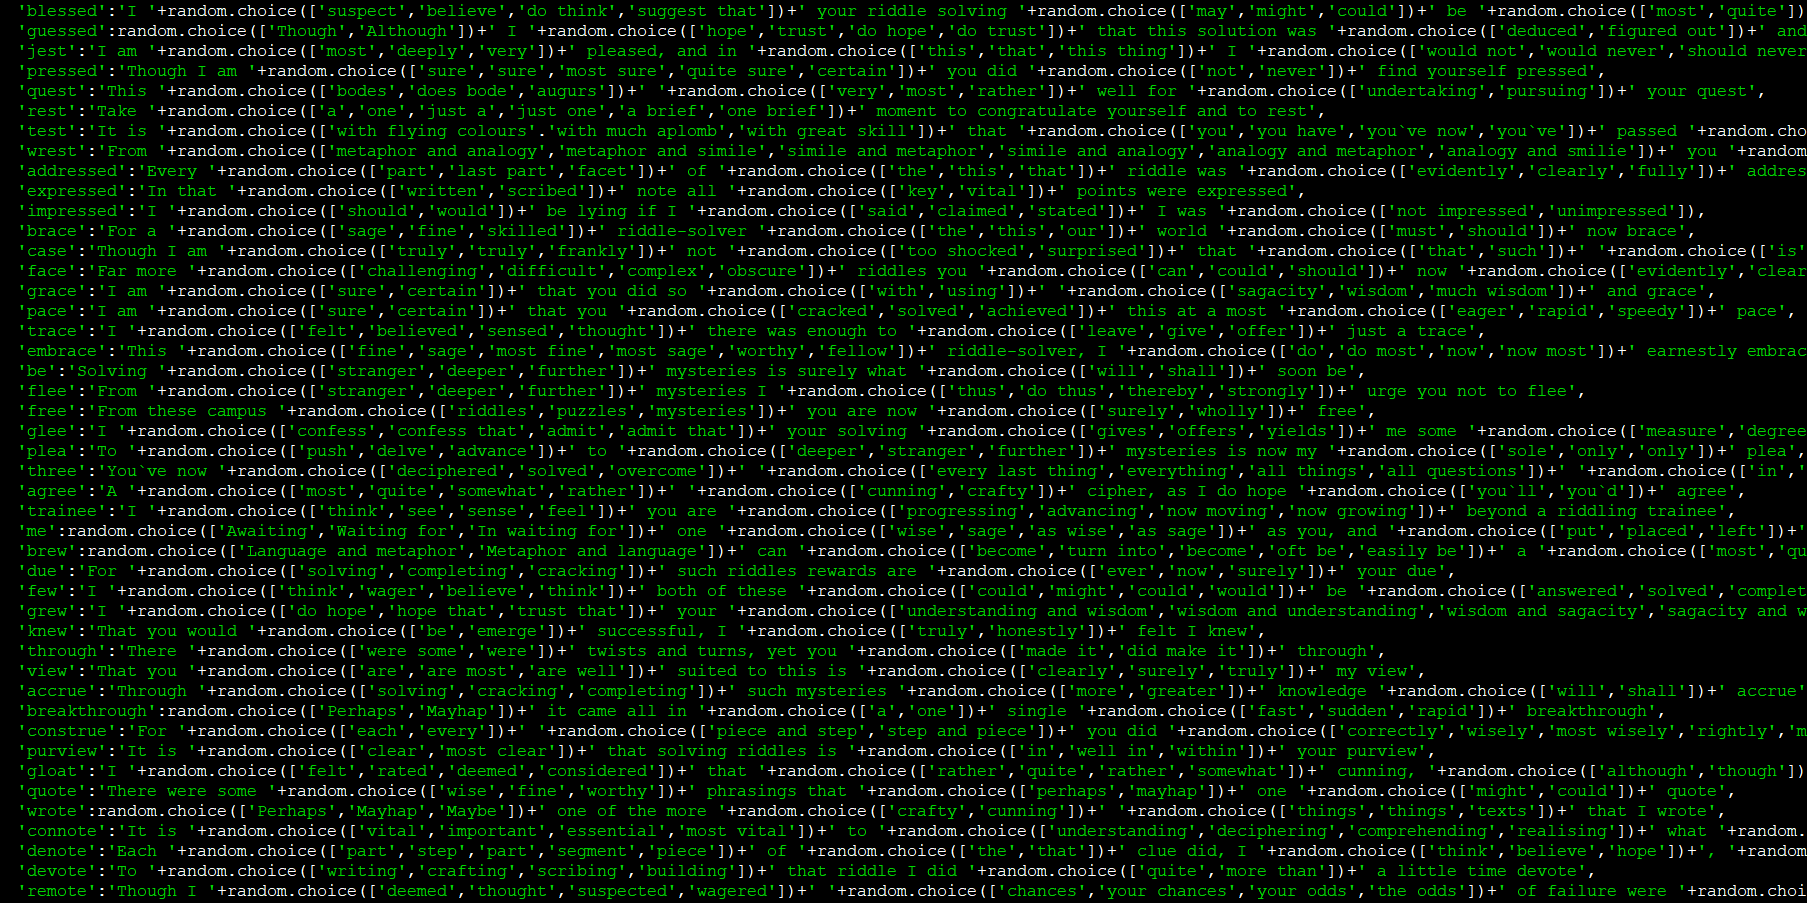
Another major thing I’ve done here is to add far more variation to the sentences in the rhyming riddle clue components. While there’s a huge degree of variation already in what rhyming pairs would be selected, in the previous update on this I only had one possible sentence that could be attached to each rhyming word. So, for instance, if the rhyme was “glee”, the sentence might always be “I confess this solving gives me some measure of glee” – in this case the curator stating as part of the clue that they are very pleased the player character has been able to figure it out. The generator selected what the rhyming pairs were going to be, but the content of each line was stationary. This was, however, naturally just a placeholder to allow me to rapidly advance with the quest without getting bogged down too much in the specifics, but now the quest is working so very well – and has all these new components as well! – I’ve gone back and ensured that every possible line instead has at least a few dozen permutations (and of course the lines themselves are permutations) so that even if the same player gets the exact same line when doing the tutorial twice (a rare scenario, but still), or maybe they compare their tutorial clues with someone else, even the same lines – e.g. the one that ends in “glee” – will now be far more varied. To stick with that example, it might yield a sentence like I confess this solving gives me some measure of glee, or perhaps I admit that your solving yields me some degree of glee, or perhaps I confess that your success offers me some sense of glee – and so on. These are minor edits, but I really do dislike the idea of the exact same sentence basically ever appearing in-game, so I’ve gone and applied this treatment to all the lines that the tutorial quest can generate. This is another one of those tasks that doesn’t take me much brain power – and the words I’m switching out are pretty basic, and they’re only used in one context in the whole game and a context the player is unlikely to repeat, so we really don’t need to be exhaustive – but just takes a little bit of time and labour, and I think is important for the overall feel of the game. So yes, all the rhyming lines for the tutorial quest now vary quite a lot within themselves, as well as the large database of potential rhyming pairs (many hundreds), and I think that’s more than varied enough for the new player’s introduction into the game.
Incorrect chests
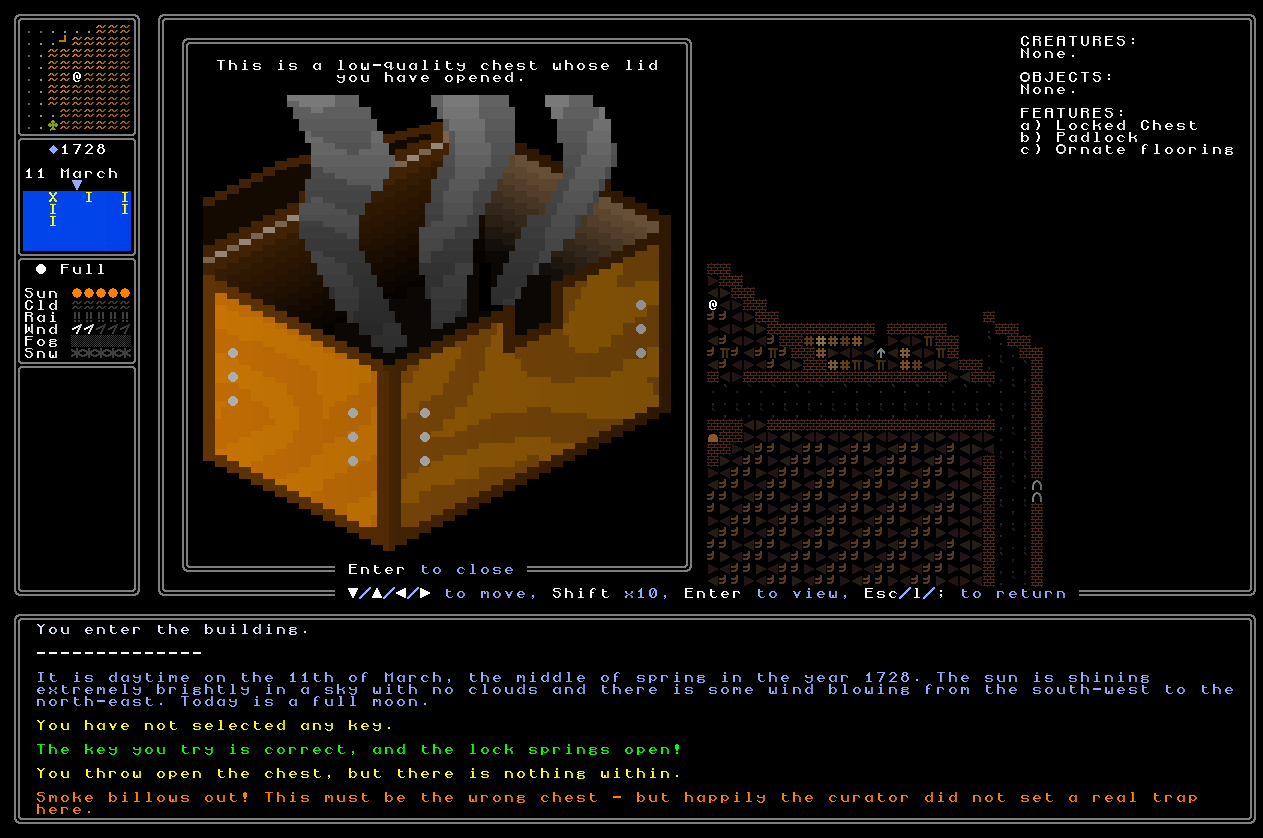
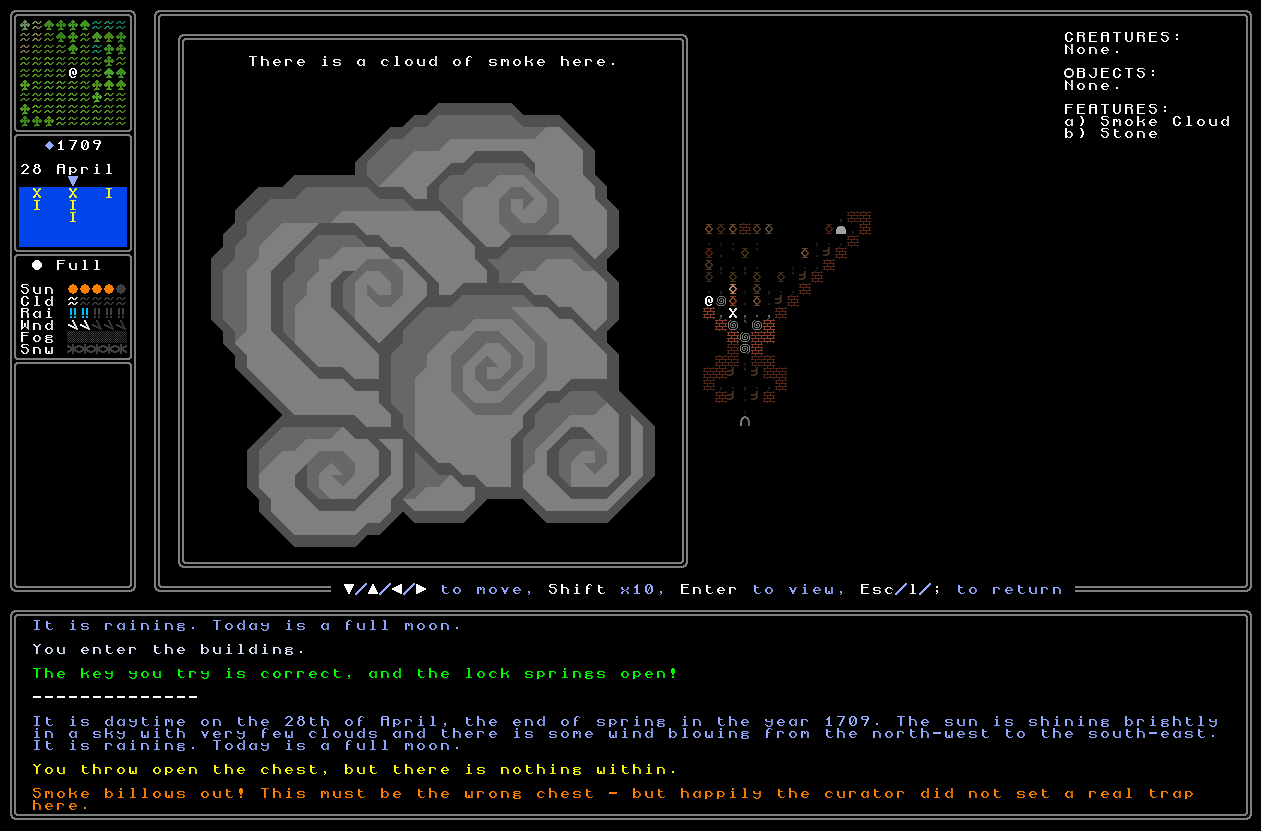
Readers may remember that the second step of the tutorial riddle tells you about a building to go inside and a chest to look for. The chest is described according to what it is orthogonally adjacent to (which the game calls “alongside”), e.g. “the chest alongside one chair” or “the chest alongside two tables and a wall”, or whatever it might be. In the previous update we just had that one chest appearing, so while it was descriptive, it didn’t need deciphering as such, since there was only one chest in the building in question – getting the right building automatically meant getting the right chest, as long as you could find where the chest was. I decided to make a change to this, both so that this part of the riddle actually means something rather than nothing, and also as a fun way to introduce the player to the possibility that chests (and doors and other things) might be trapped. As such, when you now open the wrong chests, a flood of smoke comes out! This took a minute to get working since this is code that hasn’t really been active in the game for a, er, decade, but it wasn’t too demanding, and I think it looks really cool and neat when it does appear on screen. The smoke dissipates nice and fast but does obscure the player’s vision while it’s there, and has all the appropriate visual effects that should be present; it also comes with a special message that appears at the bottom of the screen to explain to the player what actually just happened there and hinting at the possibility that later on there might be actually dangerous traps in chests, rather than just something which clearly denotes that you made a mistake. I also managed to fix a bug whereby sometimes the correct chest wasn’t the chest that was being named and described in the clue, which was a little bit tricky, but ultimately sorted out and ensured that no matter what building the final chest is in, and no matter whether you generated that building before or after getting the note telling you which chest in that building is the one to go for, that chest will always correctly exist, and will always be the right one. Phew. I also added a cool little image that appears when there’s a trap in the chest and you see smoke emerging (it can be recoloured for other things, of course, and I’ll add equivalents for other traps later! And it’ll be fun to make the equivalents for doors, too…).
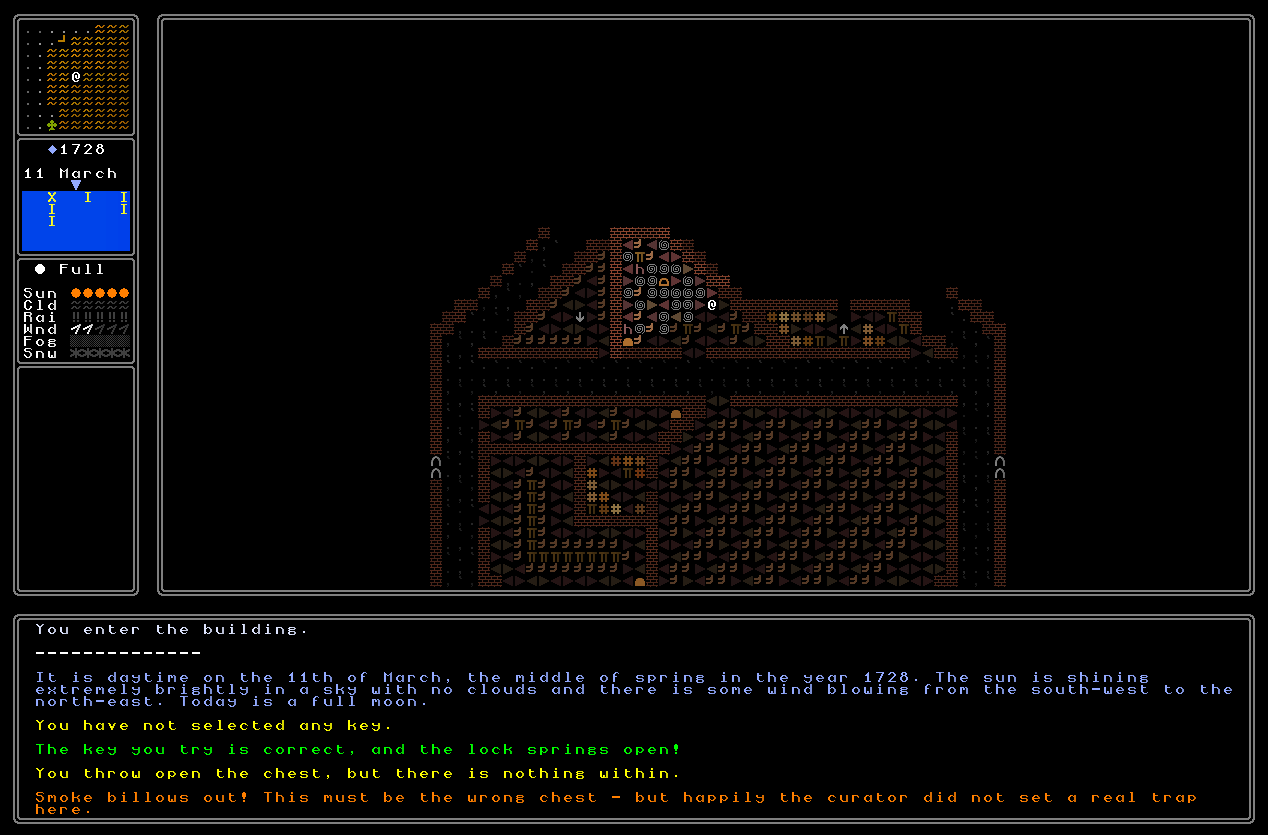
Oh, and, of course, you can now view clouds of smoke – this is some gorgeous early generative art (it’s not that generative, but it’ll do for now) and I’m happy to find it (in this one, fleeting, area), back in the game:
NPCs can talk to you
Here’s another incredibly cool thing which isn’t just valuable for the tutorial – although it certainly is – but for everything in the future as well. Until now the only way to initiate a conversation has been you approaching someone to within three tiles (i.e. anywhere within a 7×7 grid centred on them, which I feel is a reasonable distance for it to be realistic that you could have a normal conversation with someone at a normal volume, given the game’s scale) and then you start a conversation with them. This is fine, and will be all the better of course with all the work I’m doing on the new conversation system, but is rather limiting for one simple reason – characters can’t talk to you. This seems really important for all kinds of situations, e.g. maybe you’re behaving in an inappropriate way in a religious building, and it would be really cool and interesting for the priest to approach you and challenge you on your behaviour. This will also, at some point in the not infinite future, also probably be needed as a prelude to being challenged to a duel, once combat is implemented – and there’s a ton of other things it could be used for as well. However, the really important initial thing is in the tutorial, because I didn’t want there to be a chance of the player walking away from the curator without talking to them (even though I’ll add a tutorial prompt telling you to do exactly that!) and having no idea what they’re meant to be doing. And, even worse, they wouldn’t get the starting clues, and thus the whole game would be rendered, er, unwinnable. Whoops. As such, I do need to ensure that no matter what the player does when they start the game in the curator’s office, they will have a conversation with the curator. I thought about having a door locked that only opens once you’ve had the chat, but I think that still runs the risk of someone skipping the tutorial prompt to talk to them and having no idea what to do, and thus never escaping the room. It sounds daft, but we have to consider all options here – so, instead, if you try to leave the room without having a chat, the curator will now talk to you, and insist on the intro conversation before you move on.
I therefore needed to implement a system for an NPC talking to you, rather than you choosing to talk to an NPC. You start in the curator’s office / chambers and you can choose to talk to the curator to start things off, but if you don’t, and you try to move out of the office instead, then the conversation triggers anyway. That just makes sure that you have the important chat, but doesn’t start the player in the conversation – I felt it was much better to start the player in the curator’s chambers so they could experience the more “normal” game screen, i.e. walking around, being able to look at their inventory, and so forth, before the conversation starts. Admittedly it only takes a few steps towards leaving the office before the conversation will trigger anyway, but I still think this is a worthwhile difference. Anyway – how this works is that a kind of “pop-up” (I hesitate to use this term) appears on screen to tell you that someone close to you has started talking to you, and you have only one option, which is to go to the conversation. You can leave the conversation immediately under normal circumstances, which will of course seem rude to the person in question (and maybe they’ll pester you and insist on talking to you! Or be infuriated they take out their sword and challenge you to a duel), but in this case you can’t leave the conversation until you’ve heard what the curator has to say. This ability for characters to initiate conversations with you is something I’ve been meaning to add in for ages, and I was honestly really pleased by how little time it took to implement, and how cool and satisfying I think it wound up. The direction of the prompt from the ring around the person is randomly selected, but is coded to ensure it’ll always fit on the screen and never go off it. Additionally, the player character now automatically turns to face whoever is speaking them, otherwise it would be a bit strange to imagine the whole conversation with this close ally happening while you’re gazing intently at a wall. Overall I’m really pleased with this, and that the tutorial / start-of-game sections also show off the fact that characters can strike up chats with you, as well as the other way around. I think this is really cool and looks excellent, and will again add a lot more life into the world once we reach a point where other people can just strike up conversations with you when so inclined; it’s something very few big RPGs or comparable games actually do, but I think used sparingly, and with impact, it could be very compelling.
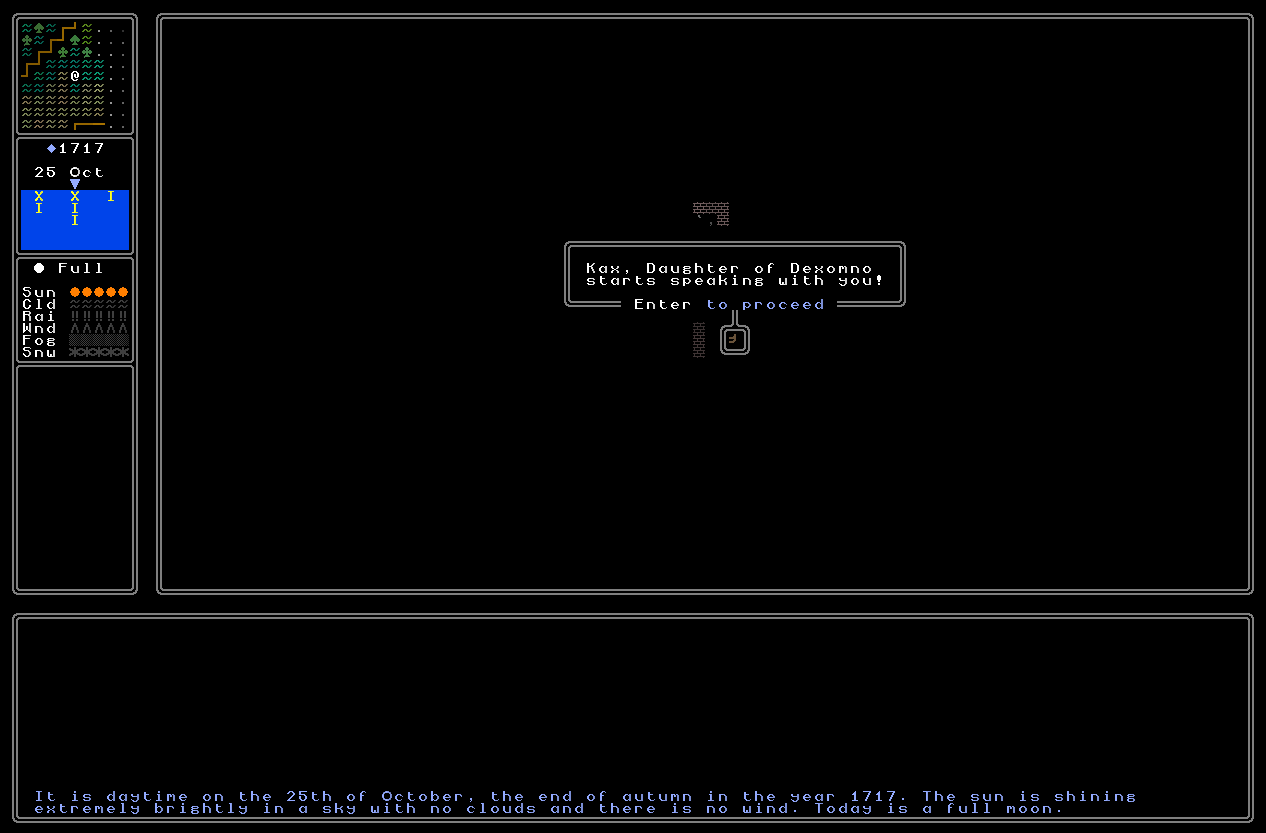
And here’s a fun gif from early-mid in the testing:
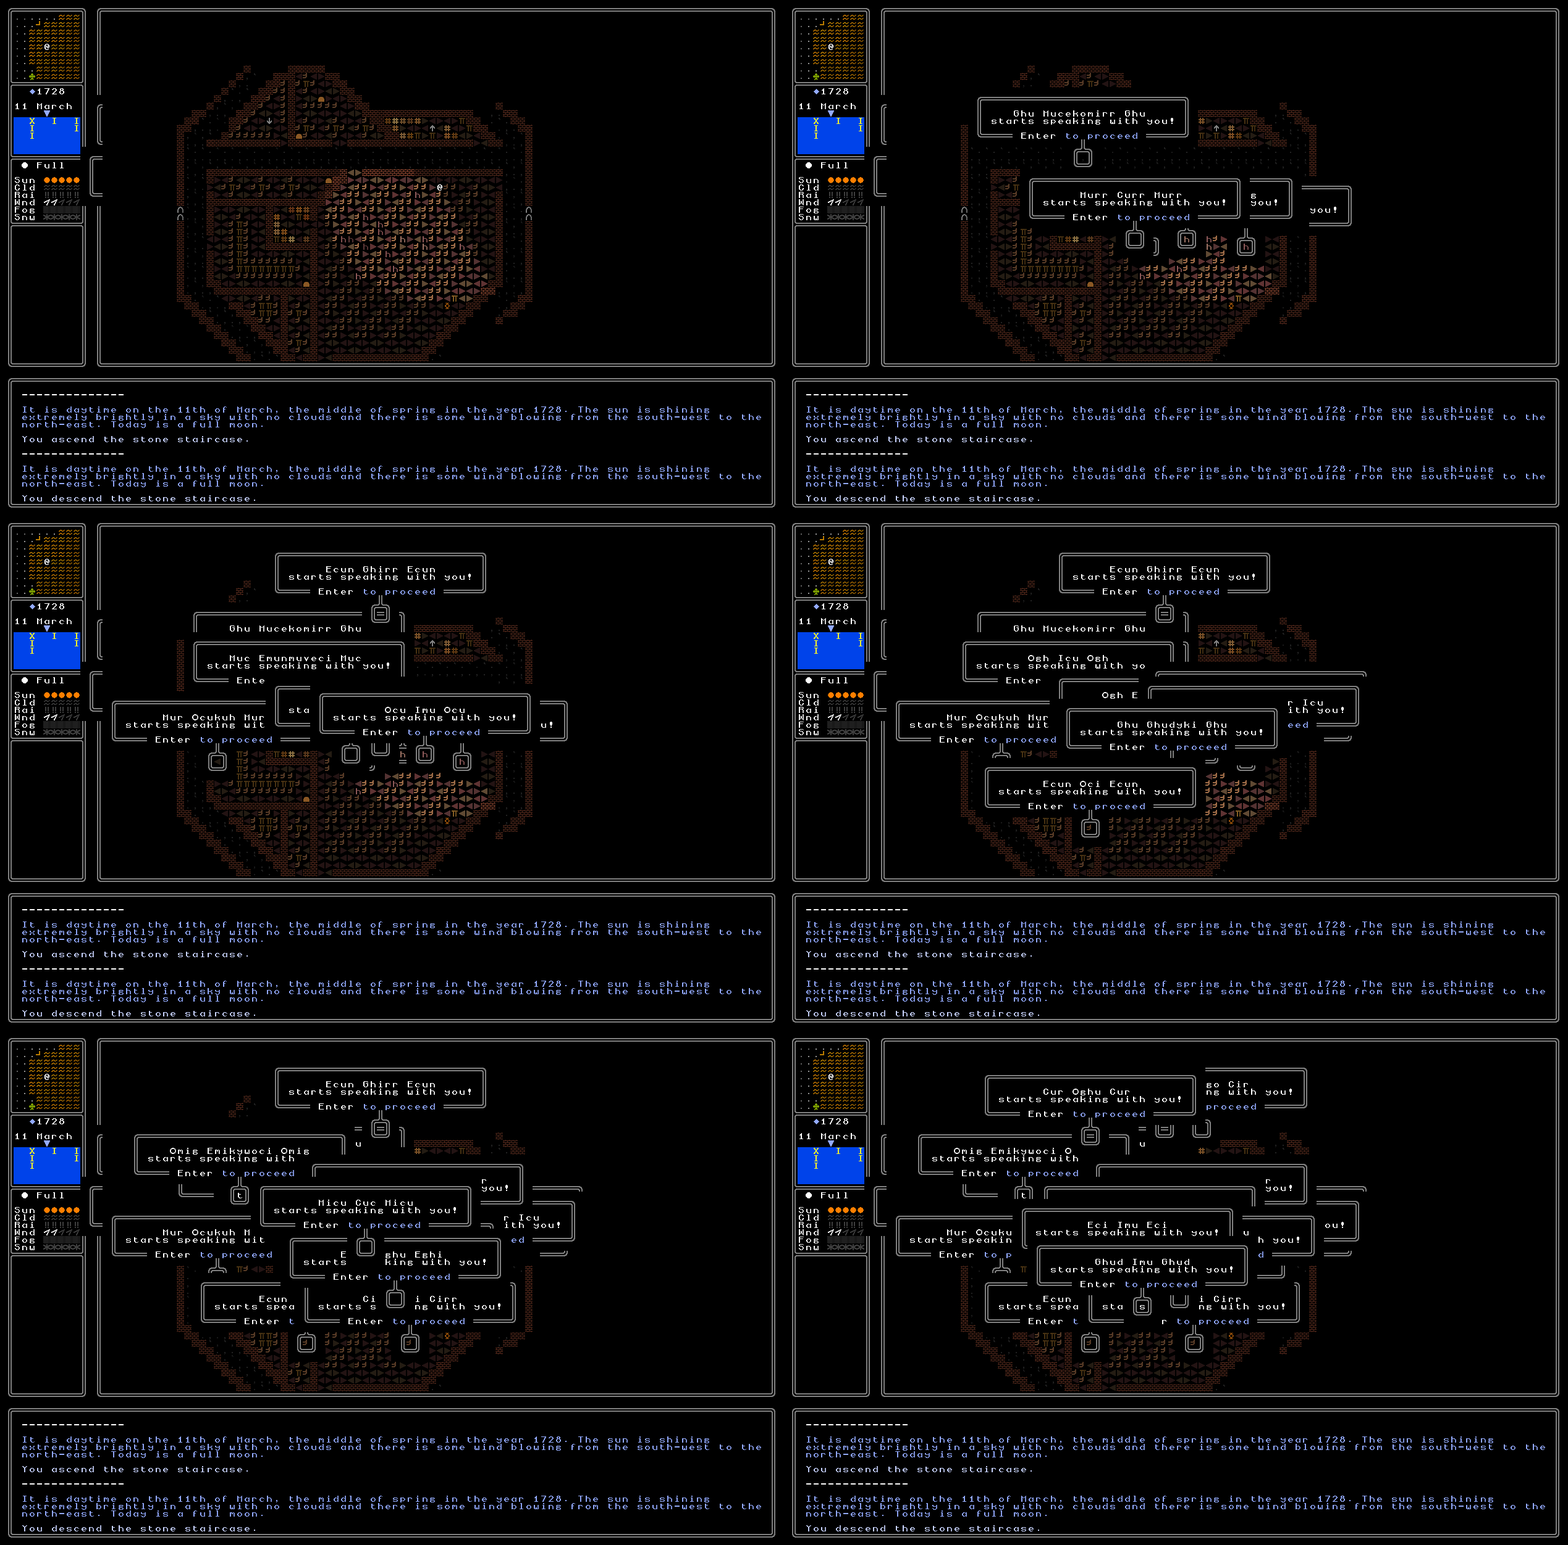
(The other really valuable thing is that this will enable guards to actually guard things, i.e. challenging you if you want to enter a certain place. Won’t be in 0.11, but may well be a 0.12 thing).
Signs outside buildings
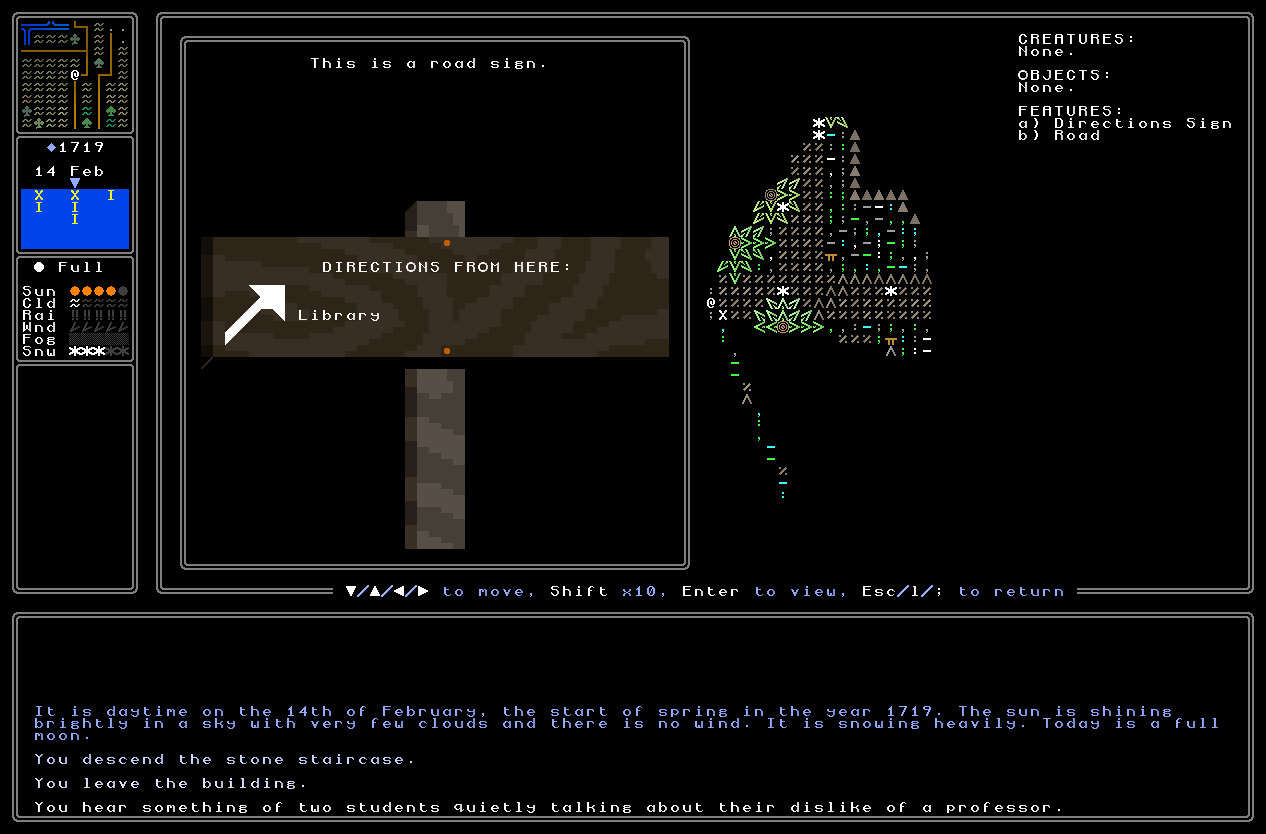
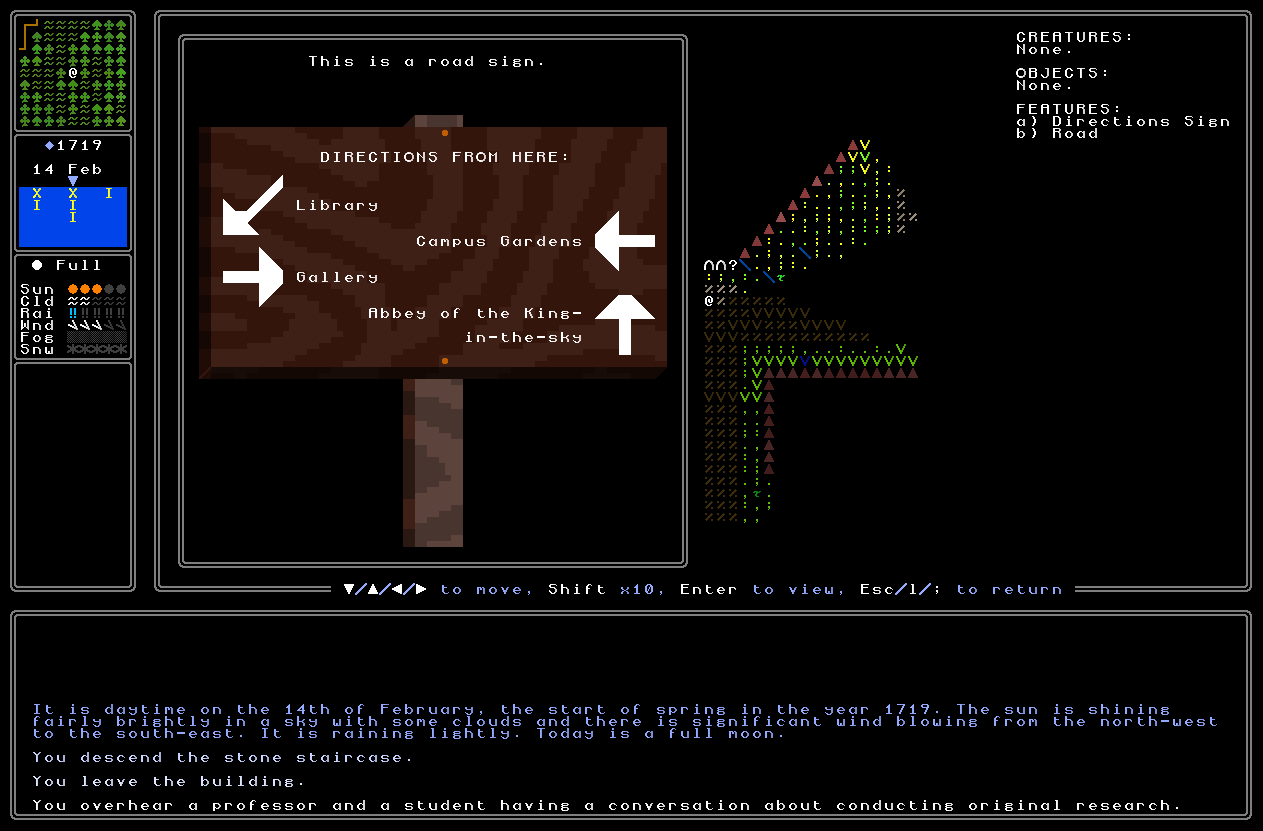
The tutorial prompts will tell you that to fast travel to an area in the map grid you’re already in, you do “T” (for travel) then “Enter” to confirm you want to travel on the tile you’re already on. That should in most cases be enough to get the player to where they need to be, e.g. they read the first clue, understand it’s talking about a library, and want to get to the library on campus. However, I have got the sense recently from a few non-roguelike players who’ve been trying out the game that things which I’m taking for granted are pretty confusing (I think this includes a keyboard control system with a large number of functions?) and so I’m really now looking for alternative ways to get the same information across to people if the earlier bits of information might not have fully registered in some way. Therefore, we now have – signs! Outside the great hall (the campus building you start in) there are now thus signs near every doorway (and the tutorial prompt also encourages you to look at them), and these signs will tell you in roughly in what direction all the major and important buildings on that campus can be found. This was a fun little generator to work on as it has an interesting combination of information that has to be sensibly put together, and presented in a way that the player will always be able to make sense of (I hope!). It just takes information about where the major buildings or sites are within a given map grid, calculates which of the cardinal (N S W E) or ordinal (NE SE NW SW) directions its entrance is closest to, creates a wooden sign of a logical size, and puts all the relevant information on it. It can also handle multiple entrances, so if something has 4 doors, and 3 would be “east” and 1 would be “north-east” then it calls them all, collectively, east; if 2-and-2, then it picks one at random (and so on). The colouring here also needed to be clear and so I wound up having the sign be painted, with darker wood colours and light paints denoting the important information. The functionality is also stuff I’ll be able to reuse in other areas; a while back I had the idea of adding signs into every local map district within a city next to all the city gates for that district, and also putting a few in towns as well, and I think those are fun ideas I’ll definitely come back to once 0.11 is out (they won’t be that much work, but again, I’m really trying to focus on only 0.11 stuff right now). The point, though, is that the signs can now have any arbitrary texts, and any arbitrary symbol to go with the arbitrary text, and that gives lots of potential for stuff later on – as well as, perhaps, being somehow entangled in riddles? Not sure – but for now, it’s just another way to support the new player in figuring out what the heck to do.
Marking out tutorial notes
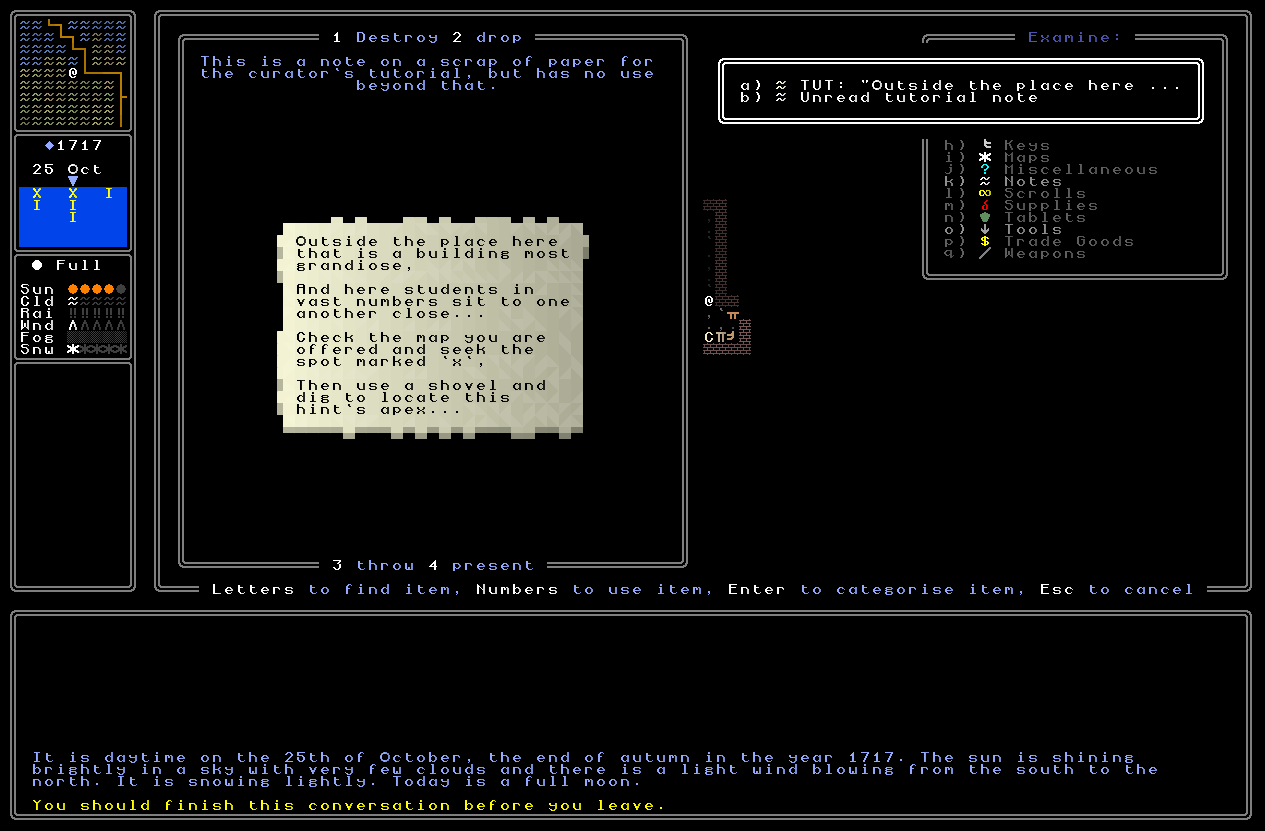
It also seemed like a really good idea to mark out tutorial notes from non-tutorial notes. My first idea was to give the tutorial notes “stripes” down their sides to denote that they are unlike all the others, but the issue was the visual clash and the aesthetic clash it created with the local map note which is part of the tutorial. This would have wound up looking a bit hideous, but just as importantly, would have also made that note far less readable for the player, especially the brand new one who still doesn’t know what’s going on and what everything is. Then I had an idea of colouring in the corners of these notes and while that looked better than the stripes option would have looked, it was still a bit visually distracting on the local map clue. Instead, I just decided to make changes to how these notes are talked about in the inventory, and also how their descriptions appear when you look at them more closely. As such, rather than “Unread note” as the default name for a, well, unread note, these instead have the name “Unread tutorial note” – and thus one I add the starting notes for the main game which the curator gives you at the same time, the player should instantly see the difference between those x 2, and “Unread note” x 2, in their inventory. Additionally, when you look at the note, rather than just saying “this is a note on a scrap of paper” (the default item description), the tutorial notes now instead say “this is a note on a scrap paper for the curator`s tutorial, but with no use beyond that”. Finally, when you first look at a note the game generates a general description of the note in question, e.g. a sense of what the text is for a written note, a sense of the most common visual elements for a map note, and so forth, and when those names are generated the game now adds “TUT: ” in front of the rest of the name, so that they remain distinct from all of the others. I think all of this is worth doing just to really clearly delineate for the player which is which, which they want to focus on if doing the tutorial, which they want to ignore if ignoring the tutorial (and they could of course just drop them in that circumstance), and again just adding more and more clarity in every way I can to these opening elements of the game.
Beginning quest generator
Finally… yes, I have begun the actual quest generator for URR. This is a huge task, perhaps the most complex I’ve ever undertaken (or perhaps not – the rhyming riddles for world map locations are really something) but the good news is that I don’t need to do anything like the entire thing for the 0.11 release. I only need to think about a handful of clue types, which are themselves still somewhat constrained – e.g. not all buildings are yet viable for being used as inside local map clues, for example – and build the basic infrastructure that can create quest threads of whatever the required length is. However, even just setting down the basics of the make_a_quest function is/was so intimidating that after I defined the function, I didn’t even know where to begin. Where do I start?! We need to be able to create various steps in a quest, we need to be able to figure out what information the player needs to solve that quest, and also – this is particularly complicated – where they get that information. That’ll be easy for the 0.11 test quests, happily, as it’ll just be that solving one part of the thread leads you to the next set of clues… but what about information stored in certain books? Where are those books stored? How accessible are they? Or information stored “in” an NPC – again, where is that NPC based and how can they be accessed? How can or might the player figure out that that’s the NPC required for the important information for this particular quest? What I soon realised is that what feeds into a quest step is going to be the complicated part, and the creating of the actual clue information that points to something is going to be, comparatively, simple. I say comparatively, of course, because I am describing a ludicrous technical and creative challenge, but still easier than the feeding-in elements, I think. Maybe. Anyway, the first thing I realised is that each quest is going to break down into steps, and it’s the steps we’ll be generating and then transferring information between them for the quest. I talked about some of this in a previous entry quite a while ago, but now it’s time to finally start properly thinking about it. What does each “unit”, in a data sense, in a quest look like, and how are they managed and stored, and connected logically to each other?
Well, I think the structure I’m going to go with is that the basic unit of a quest is a “step”. Each step then contains three parts – “inputs”, “riddle”, and “outputs”. Inputs will denote what the player needs in order to be able to solve the riddle. At the simplest, both basic level (for 0.11’s initial quest design and generating), this will just be “the clue from the previous step”, but in the future, these might expand to all manner of things, e.g. “conversation with NPC #161” or “inscription in statue in town centre of X” or “one of three books written on these burials” or whatever. For these inputs, the game will need a data structure to understand what is actually being given in those inputs, so that they can be usefully combined, e.g. if the game knows the ridlde (the middle part of a step) requires two pieces of information rather than just one, it needs to be able to identify that one of those pieces is found in a given book with given accessibility / availability to the player, and the other is found in a note given from the outcome (the last part of the previous step) of the prior riddle, and that both of these inputs are required for the player to make sense of the riddle (which we’re defining here as “what is the player actually meant to do?”). Again, here I’m starting with very “simple” inputs of just two types, these being the information given from the previous step, and information on the world map. The others will be much more complicated so we’ll come to those later, but we need a data structure that can add any kind of new input into the quest generator in later versions, and process those inputs in the same way as existing inputs, i.e. understanding what it tells the player, and how that contributes to the “riddle” step. Anyway, the riddle step is then the thing the player has to solve, and the output step describes the outputs – sometimes this’ll be another riddle, or part of a riddle, and often of course it’ll be currencies, items, and so forth. As I say, it’s clear the “input” part of a quest step is the really, insanely complicated part – even if starting quite basic for 0.11, thank the gods – while the “riddle” and “output” parts are, from a coding perspective, much easier. So my intention in sketching this out is this data structure, and then a quest is a chain of steps.
Now, I realise this is all high-level conceptual work, and I’m continuing to refine it, but this is laying the data structure foundations for, arguably, the most important part of the entire game (i.e. quest generation! The generation of things to do!). I’m going to take a bit of time here really, really, really thinking about it, so that what I implement is not something I have to adjust in the future, as that will be both very cognitively demanding, and not really a very good use of time. One of those classic cases of measure twice, cut once – or in this case, measure a few dozen times, before making the cut. I think this overall data structure will work incredibly well, though, and the challenge is unifying all inputs in a way that the game can understand what the inputs contain, and having the mutual dependencies play out correctly, i.e. the riddle must be solvable based on the inputs (so generate the riddle first…?) but the inputs have to be useful and rich enough to yield riddles from them (so generate the inputs first…?). This point is something I’m still actively working on and thinking through in my brain, and it’s possible that I might have to have them be generative in both directions. That will make the code a bit more complex, but I think it would enable options that might not otherwise be the case – this is comparable to some of the material I’ve been posting about recently in terms of pre-generating certain elements, having things generate in various orders because of the information management requirements, and so forth. Anyway – the pondering continues, and the initial coding will be starting very, very soon.
What next?
So, there we have it friends! The tutorial quests are now fully integrated with the tutorial popups / tutorial system (whatever you want to call it), and I’ve really polished the tutorial quests as well by adjusting tutorial prompts, adding the fake chests and the smoke, improving the rhyme generations, letting the curator talk to you, and adding signs around the buildings on campus to just give the new player yet another way to figure out the way between one building and another. I honestly think this tutorial section is actually looking… good? I mean… really good? I’m really happy with it – it introduces so many of the core things the player needs to be aware of (different kinds of clues, digging things up, conversations, travelling, buildings, looking at things, keys, chests, etc etc) and does so in what I think is a very easy way, and is about as simple and basic as it’s possible to do in a game that is, ultimately, about solving puzzles (i.e. the first puzzle has to actually be a puzzle, even if a very simple one, and I don’t know how to make this one much simpler unless I make the first step in the puzzle always be outside the great hall rather than a random building – and I might, but we’ll see whether playtesting suggests that actually needs doing). I’m so pleased with this. I’m sure playtesting will reveal misunderstandings I hadn’t considered and things that I need to add or adjust, but I’m basically confident now we’ve got something pretty comprehensive and clear. And, on top of all this, I’ve begun building the infrastructure for the quest generator, focusing of course on the things that we need for the 0.11 release, but still leaving room in the data architecture for other stuff to come in 0.12 and versions beyond that. This is a huge and exciting step, and I’m going to be hard at work on this in the coming weeks, as well the other final things (finish the updated conversation system, bug-fixing, finish off the final clue types, and pack it all together). As I post this I have four months left for a 2026 release, and I really am going to push for it as hard as I can. As ever, thanks so much for reading, everyone – please do think about sharing this around on the web if you think others would be interested in it, and please do let me know your thoughts below! With that, I need to get back to coding, so I’ll see you all in a fortnight…
I have been following each URR update for the past, like, 7-8 months and I’m glad to hear, that 0.11 is already in sight. For me URR is one of the most anticipated projects of this year (somewhat on level with GTA VI, lol). I guess it is because URR combines all the concepts I already love and puts it into the wrap of rouglike, making it replayable (which, as far as I know, was the main flaw of the games, based on puzzles and riddles). And, well, as a developer myself, I can only respect the effort you put into the game. When I just try to think for a moment, how to implement any system you mention, my head boils. It’s a monumental work and I’m glad you didn’t abandon it despite everything. Keep going, your work is awesome!
Hello Spamik! Thank you for this fab comment, I really appreciate it a lot. I’m so glad you’re anticipating the release (I certainly am myself!) and as you say, the main issue with all puzzle games is the lack of replay value – which I feel becomes particularly acute for the more riddle-based or deduction-based puzzle games, where there’s such a joy in uncovering the world and making deep realisations… which can only be had once. And, thank you, that’s very kind of you, we’re definitely moving into the most complex systems the game is likely to ever have at the moment! It’s mad, and from time to time I have run into temporary roadblocks, but it’s very rewarding forging through this kind of unknown terrain. A real joy as a developer, honestly.
As someone who got lost yesterday looking for a particular office in a huge set of interconnected chemistry lab buildings that had no visible maps or signs: *thank you* for adding signage to the game. Decent signs make navigation so much easier and more intuitive. They’re also a great place to hide buried items and clues (e.g., “The treasure is buried in front of the sign at the crossroads.”), or even to introduce elements of misdirection via damaged or purposefully wrong signs.
I love that in-game smoke effect and the appearance of the smoke-trapped chest! A harmless but dramatic trap like that is a great way to introduce the concept of traps. I’m the kind of player who would probably set off the trap anyway just for fun, even if I knew the chest was the incorrect one (…which sounds like a very College Student prank, but the tutorial IS set in a university…).
And figuring out the best way to build the quest generator sounds like, I daresay, a riddle unto itself. But I’m sure you’ll find a way to do it. Thanks as always for the interesting update.
Hahahaha, thank you crowbar! Yes, exactly, also a good way to hide things, and I can play with false signage later, and I’ll definitely be adding in damage as well (though not for 0.11 – again, prioritising). Glad you like the smoke too, and I agree, just a good harmless way to get the point across without actually risking the player being seriously impacted by it before they really know what’s going on…